There is a new breed of HTTP response headers, the sole purpose of which is to improve the security of your site for your readers.
In the following post, I’m going to describe the most popular headers, what they do, and why you should use them.
Content-Security-Policy: connect-src 'none' ;
font-src 'self' https://fonts.gstatic.com https://s0.wp.com ;
form-action 'none' ;
frame-ancestors 'none' ;
child-src https://ghbtns.com https://widgets.wp.com https://platform.twitter.com
https://www.facebook.com https://staticxx.facebook.com ;
img-src 'self' data: https://i1.wp.com https://i0.wp.com https://stackexchange.com
https://www.paypalobjects.com https://secure.gravatar.com https://pixel.wp.com
https://www.facebook.com https://syndication.twitter.com ;
media-src 'none' ;
object-src 'none' ;
script-src 'self' https://s1.wp.com https://connect.facebook.net
https://platform.twitter.com https://s0.wp.com https://secure.gravatar.com
'unsafe-inline' ;
style-src 'self' https://secure.gravatar.com https://fonts.googleapis.com https://s0.wp.com ;
default-src 'none'
Strict-Transport-Security: max-age=31531337; includeSubDomains; preload
Upgrade-Insecure-Requests: 1
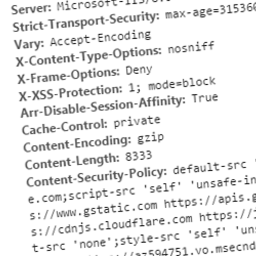
X-Content-Type-Options: nosniff
X-Frame-Options: SAMEORIGIN
X-XSS-Protection: 1 ; mode=block
Public-Key-Pins: pin-sha256="abcabcabcabcabcabcabcabcabcabcabc=="; max-age=31531337 ; includeSubdomains;
Content-Security-Policy (CSP)
This header tells the browser where it is allowed to fetch extra content from. It basically helps thwart code injection attacks that would normally fetch and run code from a remote site hosting malicious code.
This injected code could be unwittingly served from your website, or could be injected in mid-air MITM style.
Strict-Transport-Security (HSTS)
This header should ONLY be included in your headers when served over HTTPS, otherwise it is a breach of the specification. This is pretty much because this header is saying “Always Use HTTPS” and to put it in the HTTP header enables a MITM attack to remove the header entirely, which provides you as a site owner with a false sense of security that you’ve used the header in the first place.
You should be upgrading all HTTP requests to HTTPS and setting this header on all subsequent HTTPS responses – this way any browser that re-connects to your site won’t attempt to connect using HTTP, it will remember to only use HTTPS. This is helpful for when you have an old site with lots of links around the place referring to your site using the HTTP protocol.
Upgrade-Insecure-Requests
This header is somewhat redundant with site-wide usage of HSTS, but if portions of your site are still HTTP and are being migrated to HTTPS, this is the header you should use in your HTTP (not HTTPS) responses to tell the browser that all links in the content being served should be treated as if they were `https://` instead of `http://`.
X-Content-Type-Options
The only value for this header is `nosniff`. It basically prevents the browser from trying to guess the content type of a fetched resource.
This adds a useful stop-gap in the event that one of the resources being referenced from your site changes from something benign to something malicious – if an image hosted on your server is replaced somehow with malicious JavaScript, but the header type being returned along with the javascript is still `Content-Type: image/png` or similar, then the browser should try to interpret that JavaScript as an image, and if it fails, then ignore it, raise an error, and move on.
Historically, where the Content-Type of data returned from a request doesn’t match what the browser is expecting, the browser takes it upon itself to try to guess the content type to use the content anyway, which lead to security issues.
X-Frame-Options
Prevent your site from being served from within someone else’s `iframe`. This has been a popular way for hackers and clickjackers to make you think you are browsing one site, but instead you are just browsing the site through an invisible frame in a different site. This enables mouse or keyboard actions on the iframe (making it look like you’re clicking on your site) to be hijacked and/or recorded.
The `SAMEORIGIN` policy as used above, ensures any iframes linking to [parts of] your site are themselves hosted on the same domain as your site itself. So you can have parts of your own site in your own iframes, but no other domains are allowed to host an iframe pointing to [parts of] your site.
X-XSS-Protection
This header is largely redundant, in that XSS protection should be enabled by default in all browsers anyway, but this serves to forcefully turn it on if it isn’t already.
Cross-Site Scripting can happen in several ways, but generally involves scripts executed on a different site to send requests from that site to your site, but to make it look like the user is doing it deliberately. A common scenario is that a request launched via JavaScript from `http://evil.example.com` makes a `POST` request to your site, e.g. to perform some action that only that user can perform, such as update their password… Or transfer money from their bank account…
Public-Key-Pins (PKP)
This is a way of “pinning” the SSL certificate your site is using to your domain, so if a server tries to impersonate your site, the SSL connection will be rejected, as they won’t have the site certificate they need.
These days there are a lot more CAs than there ever used to be, and recently there have been some emerging that offer free SSL certificates – like Let’s Encrypt for example.
(Incidentally, I wholly recommend this site and will be switching my site over to using it very soon.)
In the event that the domain is DNS hijacked, your browser may try to make an SSL connection to a new server… if this happens for a long enough time period, an SSL certificate could be systematically issued to this new server, so when you connect to this new server, you’d see the pleasing green address bar (assuming their very new certificate is valid), and the domain name matches what you originally typed in.
At this point, before you’ve even typed anything in, your browser has sent this malicious site your protected session cookies, and possibly even entered your username and password into the login dialog on your behalf, if you’ve got a password manager that does this for you.
Your browser doesn’t know not to do this! It’s a legitimate site that you’ve logged into before, it’s just got a different SSL certificate, but who cares, right? As long as it’s valid?!…..
Public Key Pinning means that when you connect to a legitimate site with SSL, the browser will remember the signature of that certificate until it expires (with some extra conditions to enable the certificate to be updated).
So when a MITM attack does happen and your browser tries to connect to this new IP with HTTPS, it will be automatically rejected and you should receive a nice big red warning page telling you the site certificate is not what it expected.
This thwarts an attack that is getting progressively easier and cheaper to carry out.
* * *
At last count there were 176 Root CAs in the list bundled within Mozilla Firefox.
These authorities are trusted implicitly – any valid certificate signed by one of these is trusted by your browser, at least unless it violates the PKP header.
These CAs sign certificates for “Intermediate Certificate Authorities” who in turn can sign certificates for other intermediate CAs, as well as the usual end-user domains.
This all means that there is a whole heap of delegated trust out there, just one of those CAs or intermediate CAs needs to be compromised in order to allow the hacker to sign certificates for any domain they like, and carry out highly successful MITM attacks without detection.
/! If you install your own root CA certificate into your system, you’d better make sure that the private key for that certificate is kept somewhere *really really safe* – because if anyone else gets hold of it, they can perform a MITM attack against you on any site and you probably won’t notice.
Companies unfortunately use internal root CA certificates quite a bit, primarily so that they can easily manage secure connections within the company intranet, but it also enables them to intercept all your other SSL connection setup requests at the gateway, and effectively perform a MITM attack against you at your work’s gateway, albeit with less malicious intentions… (you hope.) So do you trust your company to handle this certificate responsibly? If it gets into the wrong hands, a person with malicious intentions could intercept and read all of your communications made on the company network.
All of them. (Except the ones protected with PKP!)
This is why it’s a big deal when owners of root CA certificates misbehave – the consequences could be catastrophic.
Similarly, when CAs are compromised – it will undoubtedly end badly for the company responsible, or they will at least have the wrath of governments to deal with. These incidents undermine the security that is fundamental to the Internet.
According to Scott Helme’s research, only 0.0265% of sites in the top 1 million sites on the web (according to Alexa rankings) were using PKP. This is a little concerning, given what we’ve just learned – and although this number has increased by ~68% in 6 months, it’s still a tiny number. Companies aren’t doing enough, but maybe
I leave the choice up to you which security headers you use on your site. I suggest you use them all.
WordPress Plugin
I have written a WordPress plugin that enables the owner to add their own custom HTTP response headers to their WordPress site. I wrote it because I couldn’t find any existing plugin that enabled me to do this, at least not with the flexibility I wanted.
This is the method I used to add (nearly) all of the security headers described in this blog, to my site.
Check it out here: Headit.
Further Reading