
When you’re working in a remote terminal environment, being able to resume a session can be an invaluable tool – especially when the connection isn’t stable.
When connecting to a UNIX-based environment (like the many varieties of Linux, or OSX) there is a handy utility called `screen` that effectively allows you to run tabbed terminal consoles within a single terminal console. This has many benefits, not just the ability to resume the connection if the connection drops.
adding a status bar
The first thing to do when starting any new screen session, is to add a config file. This file changes the default look and feel of screen, which isn’t very intuitive if you’re just learning how to use it.
I’m going to use `vim` to write my config file, and I’m going to use a configuration that I pilfered from somewhere on the internet a while ago:
# ~/.screenrc
termcapinfo xterm* ti@:te@
startup_message off
vbell off
autodetach on
altscreen on
shelltitle "$ |bash"
defscrollback 100000
defutf8 on
nonblock on
msgwait 0
hardstatus alwayslastline "%{b kw}%H %{r}%1` %{w}| %{y}%Y-%m-%d %c %{w}| %{g}%l %{w}| %{-b kw}%u %-Lw%{= rW}%50> %n%f %t %{-}%+Lw%
# (This fixes the "Aborted because of window size change" konsole symptoms found
#  in bug #134198)
termcapinfo xterm* 'is=E[rE[mE[2JE[HE[?7hE[?1;4;6l'
# (you may have to change the 'xterm' value to match your $TERM value)
The most useful lines in this config file are the last two – they add the status bar to the screen window, which contains the list of open terminal tabs – which is verrry useful and I don’t know why this isn’t the default setup.
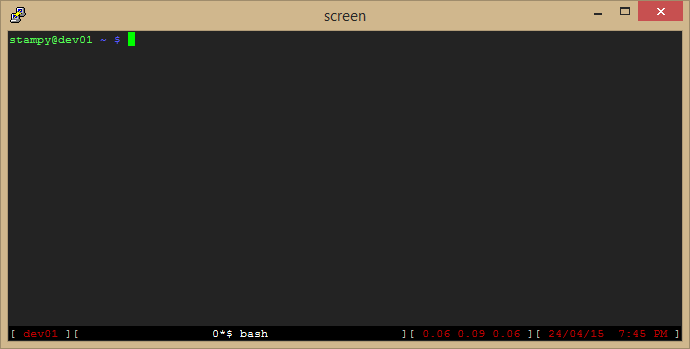
In the configuration shown above, the status bar contains the hostname on the left, the system load on the near right, and the server date and time on the far right, and your list of open terminal tabs in the middle.
Save this file into your home directory (usually `/home/yourusername/.screenrc`) and start start screen by running the command `screen`, and your window should look similar to this:
tab navigation
Press `ctrl-a c` to open a new tab
Press `ctrl-a shift-a`, change the name, and press `return` to save.
Press `ctrl-a-a` to switch between your most recent 2 tabs, or use `ctrl-a [num]` to switch to the tab numbered `[num]`, i.e. `ctrl-a 1` to switch to tab 1, `ctrl-a 2` for tab 2, etc.
detach and re-attach
I’ve pointed out that I believe the most useful feature of screen is the ability to detach and re-attach to screen sessions in the event of being disconnected from the server – so how do you go about actually doing that?
When you have connected to the server, to create a new screen session you type `screen` – but to re-attach to an existing disconnected screen session, type `screen -R`.
Sometimes, if you have disconnected very recently, the old screen session might still be attached to your old session! In order to tell screen you want to resume an existing screen session, and forecfully disconnect it from any connected session, use `screen -dR`. This does mean that if you have superuser privileges on the system to which you are connecting, anyone else who can assume control of your account can also take control of your screen session!
To detach your current screen session, press `ctrl-a d`.
locking your screen session
While in a screen session, press `ctrl-a x` to lock your session. This protects your open terminal sessions from being taken over by someone who might have access to your account. This won’t protect you from much, but it does add an extra layer of security that can help to delay or prevent security breaches.
This becomes a more useful feature when you realise that as a superuser, you can have multiple terminals open in screen, each one connected to a different server, each one potentially logged in as a more privileged user than the original screen session itself – so if a hacker manages to acquire the user’s username and password, they would be able to log in and resume all of these already logged in sessions with little more than a single command.
… so Lock Your Terminal!
scrolling history
When in cursor mode, you can search for patterns, and highlight and copy text too.
- Press `ctrl-a Esc` to enter interactive cursor mode
- Use the cursor keys (`up`, `down`, `left`, `right`, `PgUp`, `PgDn`) to navigate back in the history of the current screen terminal
- Press `Esc` at any time to exit cursor mode and return to normal interactive mode
- Press `Return` to start highlighting text at the position of the cursor
- Use the cursor keys to select desired text
- Press `Return` again to copy the selected text into the screen paste buffer – This will also exit cursor mode and return to interactive mode
- To paste the text you’ve just copied, press `ctrl-a ]` when you’re in a suitable location. You can use this technique to copy and paste chunks of text or commands between console windows in the same screen session.
When in cursor mode, you can also search forwards and backwards using `/` and `?` respectively, just like in `vim` – to search “up” the screen from the cursor location, enter `?`, type your search string, and press `return`.
To find the next or the previous piece of text that matches your entered search, press `/` or `?` again and just press `return`.
further help
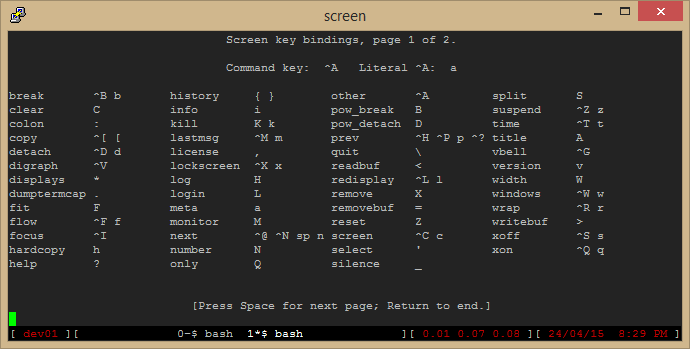
To access the help menu in screen, press `ctrl-a ?` and you will be presented with a list of further commands you can try out, which aren’t described quite as concisely as they are on this page, but they are a useful cheat-sheet, once you learn how to read the syntax.
bonus content
You might have noticed that my terminal prompt has also been customised – the code for this is added to the end of the file found in `/home/[yourusername]/.bashrc` – add the following code to the end of your `.bashrc` file:
# ~/.bashrc
PS1="$(if [[ ${EUID} == 0 ]]; then echo '[33[01;31m]h'; else echo '[33[01;32m]u@h'; fi)[33[01;34m] w $([[ $? != 0 ]] && echo "[33[01;31m]:([33[01;34m] ")\$[33[00m] "
